NDT Quality & Homogeneity Evaluation
EN 12504-4 | ASTM C597 | ASTM D6760
|
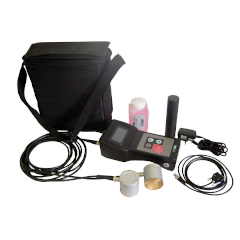
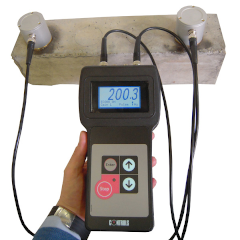
Ultrasonic Pulse Velocity tester is used for quality control and inspection of concrete.
It measures the transit time of ultrasonic pulses through concrete for inspection of new and old structures, slabs, columns, walls, fire damaged areas, precast and prestressed beams, cylinders and other concrete forms. Combined with an oscilloscope can identify honey combs, voids, cracks and other non homogeneous conditions in concrete. 58-E4800: Ultrasonic pulse velocity tester Hand held light instrument, battery operated, microprocessor incorporated, supplied complete with two 54 kHz transducers (transmitter and receiver), calibration rod, 250 mm of coupling agent, instruction manual and carrying case. The meter can also be used with low and high frequency transducers. 58-E0046/30: 24 kHz transducer head (1 piece) 58-E0046/33: 150 kHz transducer head (1 piece) 82-P0172/B: 24 column serial printer, rechargeable battery operated. External battery charger and batteries included. 110-230 V, 50-60 Hz, 1 ph 82-P0172/1: Connecting cable for printer |
|
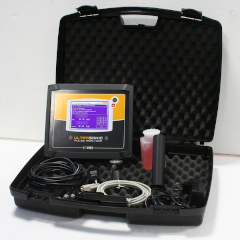
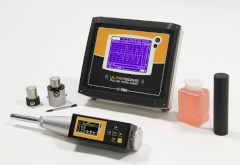
Ultrasonic Pulse Analyzer, PULSONIC, is used for measuring the velocity of ultrasonic pulses through a concrete section providing informations on cracks, voids, strength, and giving quick estimates of dynamic modulus of elasticity on site or in the laboratory. It can also be used for estimating times for formwork striking.
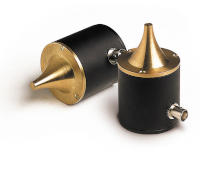
The pulse velocity can be combined with the rebound hammer value for the strength evaluation of concrete. 58-E4900: PULSONIC, Ultrasonic pulse analyzer The unit includes an excel spreadsheet for the acquisition of the waveform on the PC for further elaborations. Testing heads (probes) The standard 50 kHz transmitter and receiver heads are supplied with the tester. Different heads are available with different nominal working frequency, 24 and 150 kHz which is the usual range for normal concrete: the highest (150 kHz) is indicated for homogeneous concrete, the lowest (24 kHz) for heterogeneous concrete. Model 58-E0046/5 special probes with exponential profile, are used for the identification of minute cracks, air bubbles or material with low density. Two pieces are required. Model Nominal frequency Dimensions (kHz approx.) (mm) 58-E0046/30 24 Dia. 50x52 58-E0046/33 150 Dia. 50x52 58-E0046/5 54 Dia. 7/50x82 (exponential profile) |
|
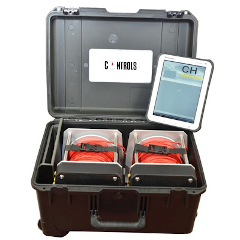
Cross-Hole Analyzer for foundation piles Wireless modular version
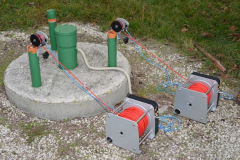
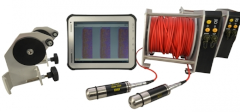
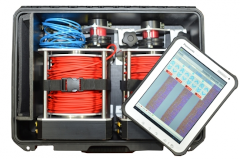
The cross-hole method is a way to analyze the foundation piles of buildings, which, with the use of cross-hole ultrasonic pulses, allows accurate, high-resolution tests to be carried out. An ultrasonic wave is sent from a transmitter to a receiver and is conveyed automatically by the device along the entire length of the pile via the pipes embedded into it during casting. The speed of the sonic wave and its energy are strongly influenced by the quality of the concrete and it is therefore possible to assess the characteristics and give a tomographic representation in 2D called diagraphy. 58-E4600/E: Wireless modular system for Cross-Hole ultrasonic investigation on foundation piles comprising:
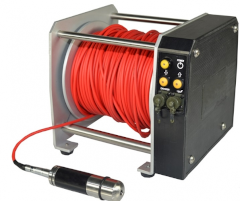
The instrument is a complete system for performing structural tests by ultrasound on piles, deep foundations, infrastructural works or buildings. Each reel system has a 52 kHz motorized probe with 60 m of cable and also houses the battery plus all the electronic controls that automatically manage the probes during the descent / ascent phases (cross-hole) and saving of the test data. The configuration practically eliminates the need for physical cables and is supplied with a Rugged tablet which allows the setting of all parameters, test management, and display / processing of the acquired test data in an easy, immediate and wireless way. The system can directly manage up to 4 motorized coil systems from one tablet. Using 2, 3 or 4 motorized reels it is possible to increase the survey productivity and reduce testing time: with a single ascent / descent of the probes in the pile to be checked (which must have 2, 3 or 4 integral pipes) it is possible to obtain results for the corresponding sections. The data are acquired at each pulse and displayed in real time on the tablet screen allowing any imperfections in the structure being inspected to be seen immediately. The procedure for running cross-hole surveys with 2, 3 or 4 channels is managed in a fully automated way. The only manual operations required are the positioning of the encoders for reading the position of the motorized probes on the pipes and the initial alignment of the probes on the pile head. The test is started by simply pressing a button and it is possible to verify the test data step-by-step in order to check the test progress in real time. |

